Organise transport — step by step
This guide shows how PLANA Pulse runs a delivery with full location tracking. Goods don't jump straight from the warehouse to the customer — they move through real stages, and at every moment you can see where they are: in stock, on the ramp, in the truck, or delivered.
The full path:
Stock → Ramp → Truck → Customer
Each stage is a separate operation that a warehouse worker or the driver confirms (by scanning a barcode), so the goods are never lost track of. (Screenshots show the Bulgarian interface.)
Who does what
| Role | Task |
|---|---|
| Sales rep | Creates and confirms the order |
| Warehouse worker | Picks goods to the ramp and loads them onto the truck (scanning) |
| Office / Dispatcher | Creates the route — picks the truck and the driver |
| Driver | Drives the route and delivers to the customer |
Step 0 — The trucks (one-time setup)
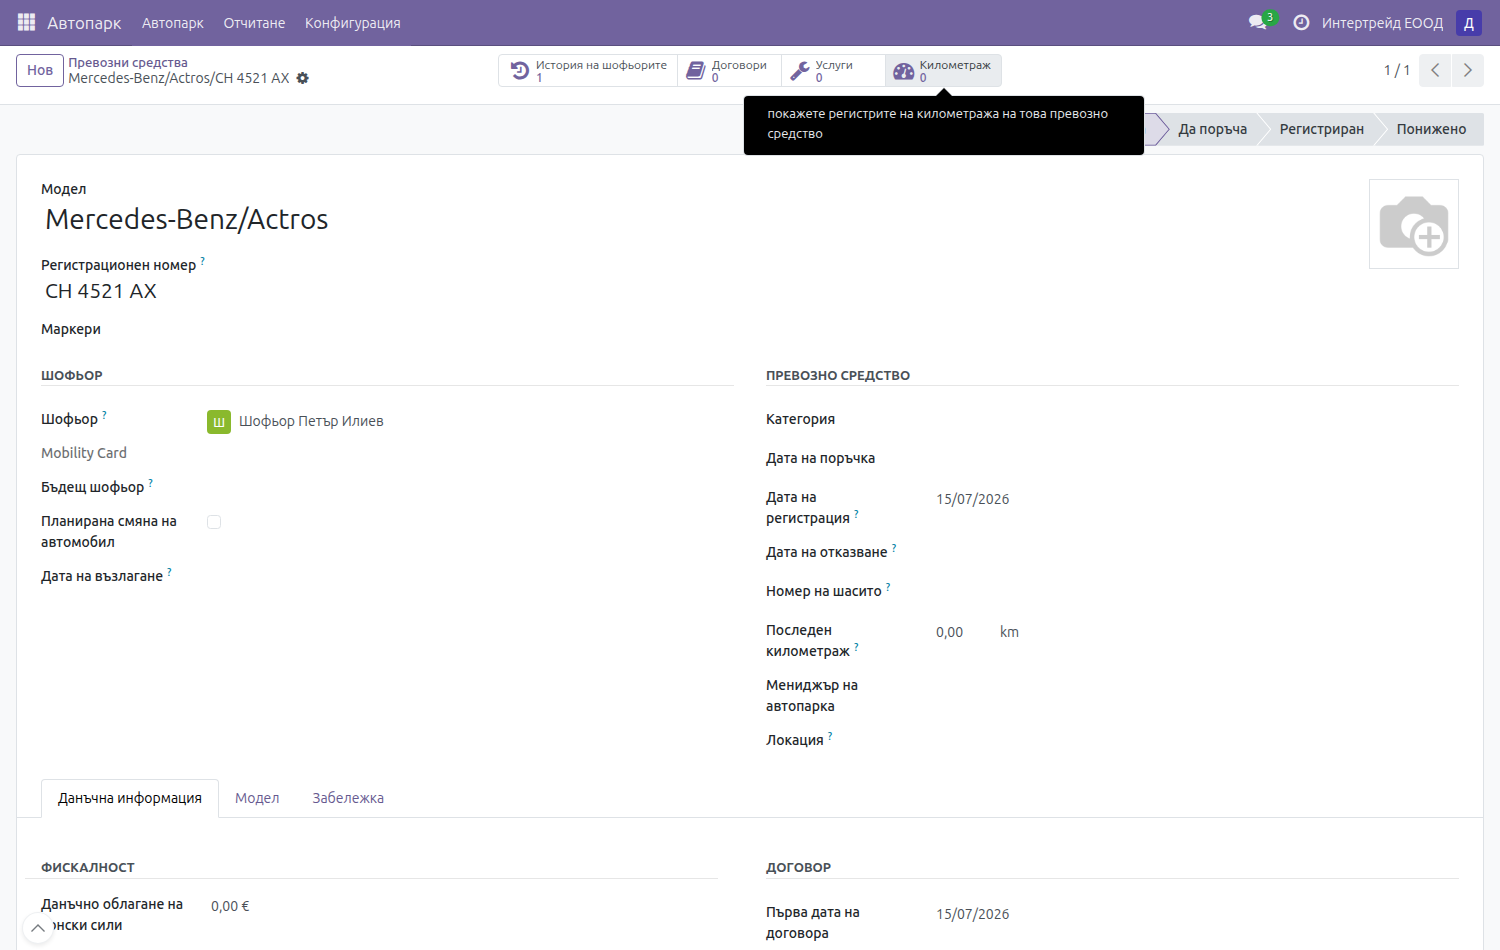
Trucks are entered once in the Fleet app, then chosen for each route. Fleet → Vehicles → New — brand/model and licence plate (optionally a default driver).
Step 1 — Order (Sales rep)
- Sales → New.
- Pick the customer and add the products.
- Click Confirm.
On confirmation the system automatically creates the first warehouse operation — Pick (Събиране). The later stages appear one at a time as you finish the previous one — this is expected.
Step 2 — Pick: Stock → Ramp (Warehouse worker)
Goods physically come off the shelves and move to the ramp for loading.
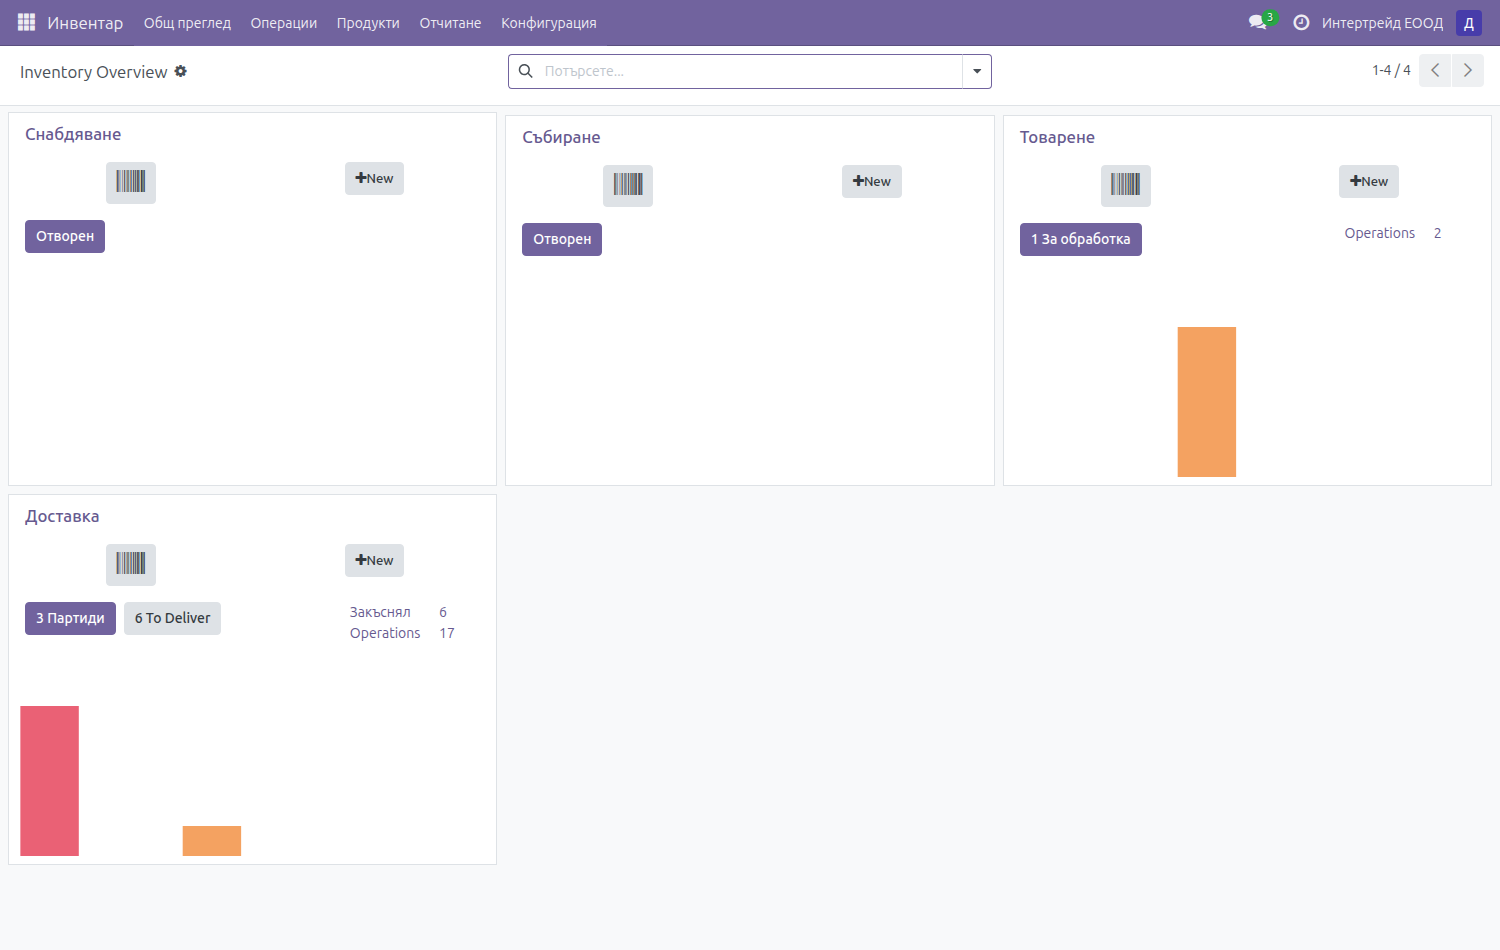
- Inventory → Overview → Pick (Събиране) → open the document (e.g.
WH/PICK/00002). - Click Check Availability — stock is reserved (state becomes Ready).
- Open the line and click the barcode icon in the top bar (the icon-only button) — the scanner opens.
- Scan each product's barcode. The quantity is confirmed by the scan and the product photo shows on screen. Manual entry is disabled — the wrong item simply can't be picked.
- Click Validate.
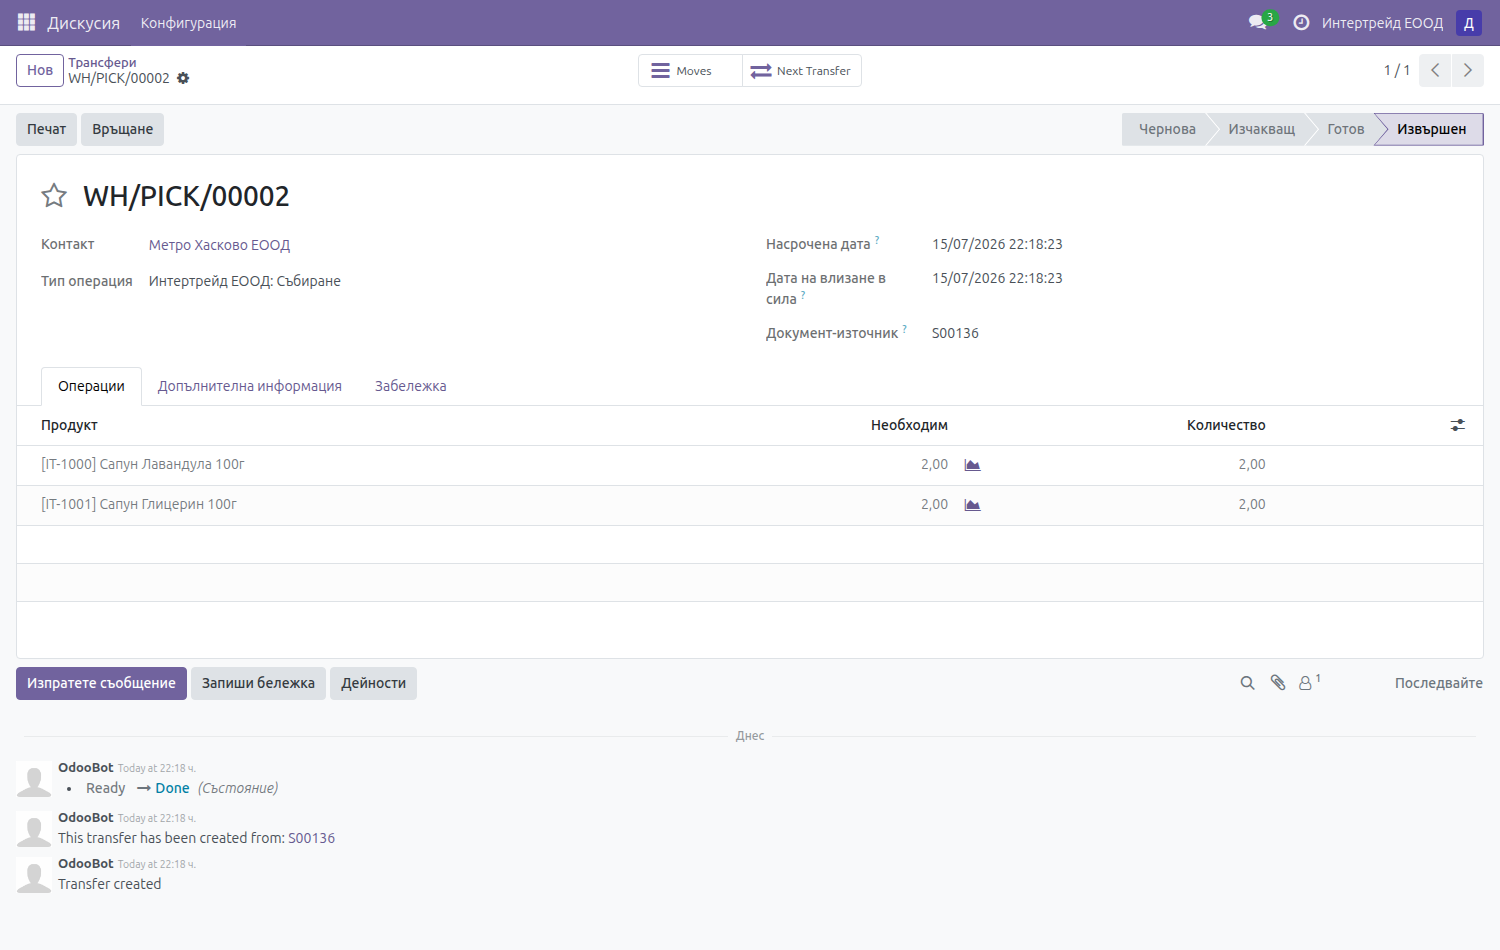
Scanning a product during picking (with the product photo):
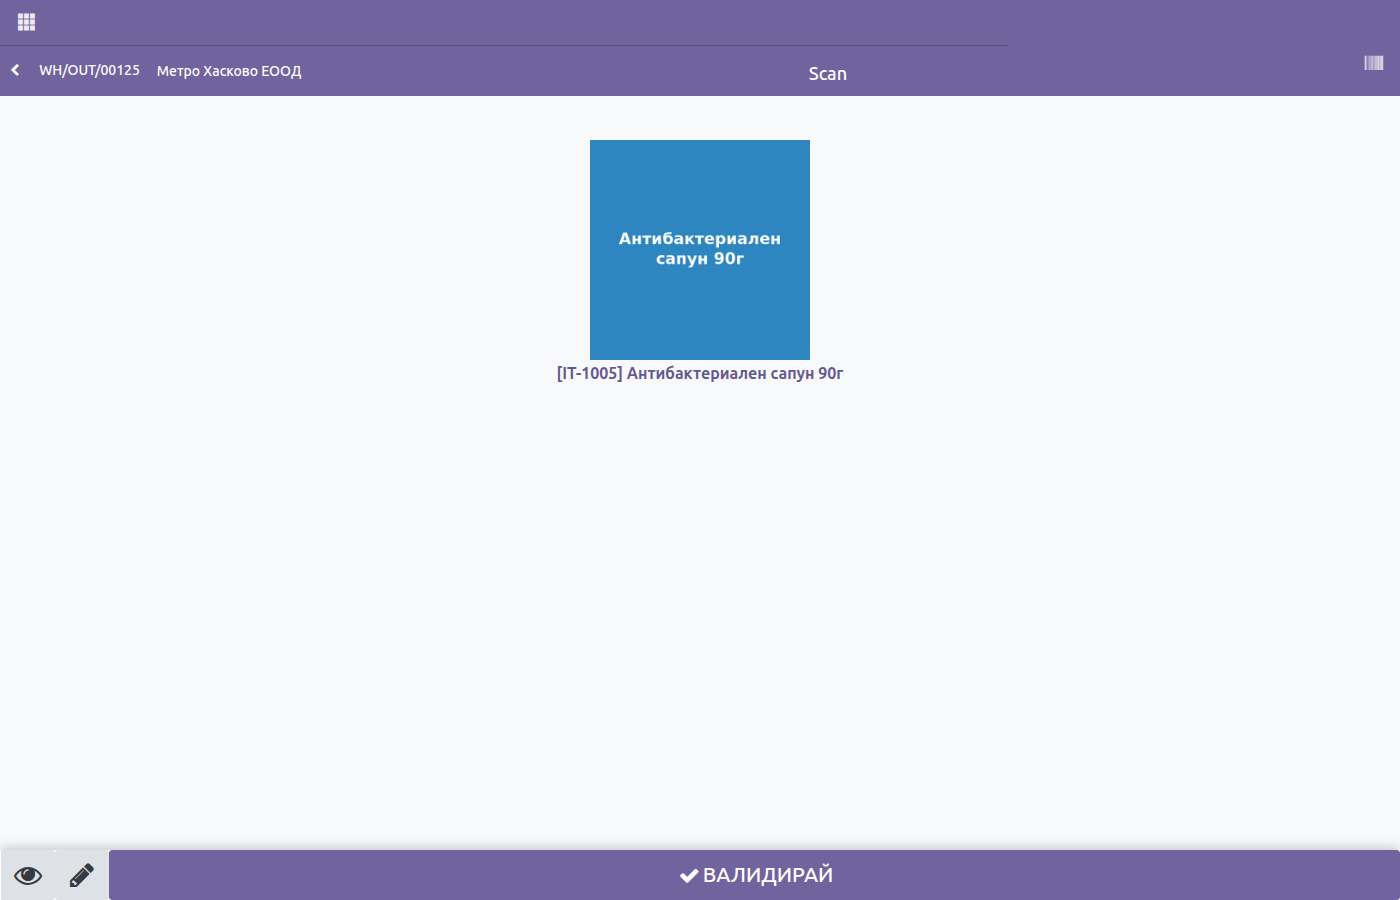
➜ Goods are now on the Ramp.
Check: where is the stock right now?
Any time, see exactly where each product is: Inventory → Products → On-Hand Quantities. The same product shows across locations — in Stock, on the Ramp, and in the Truck.
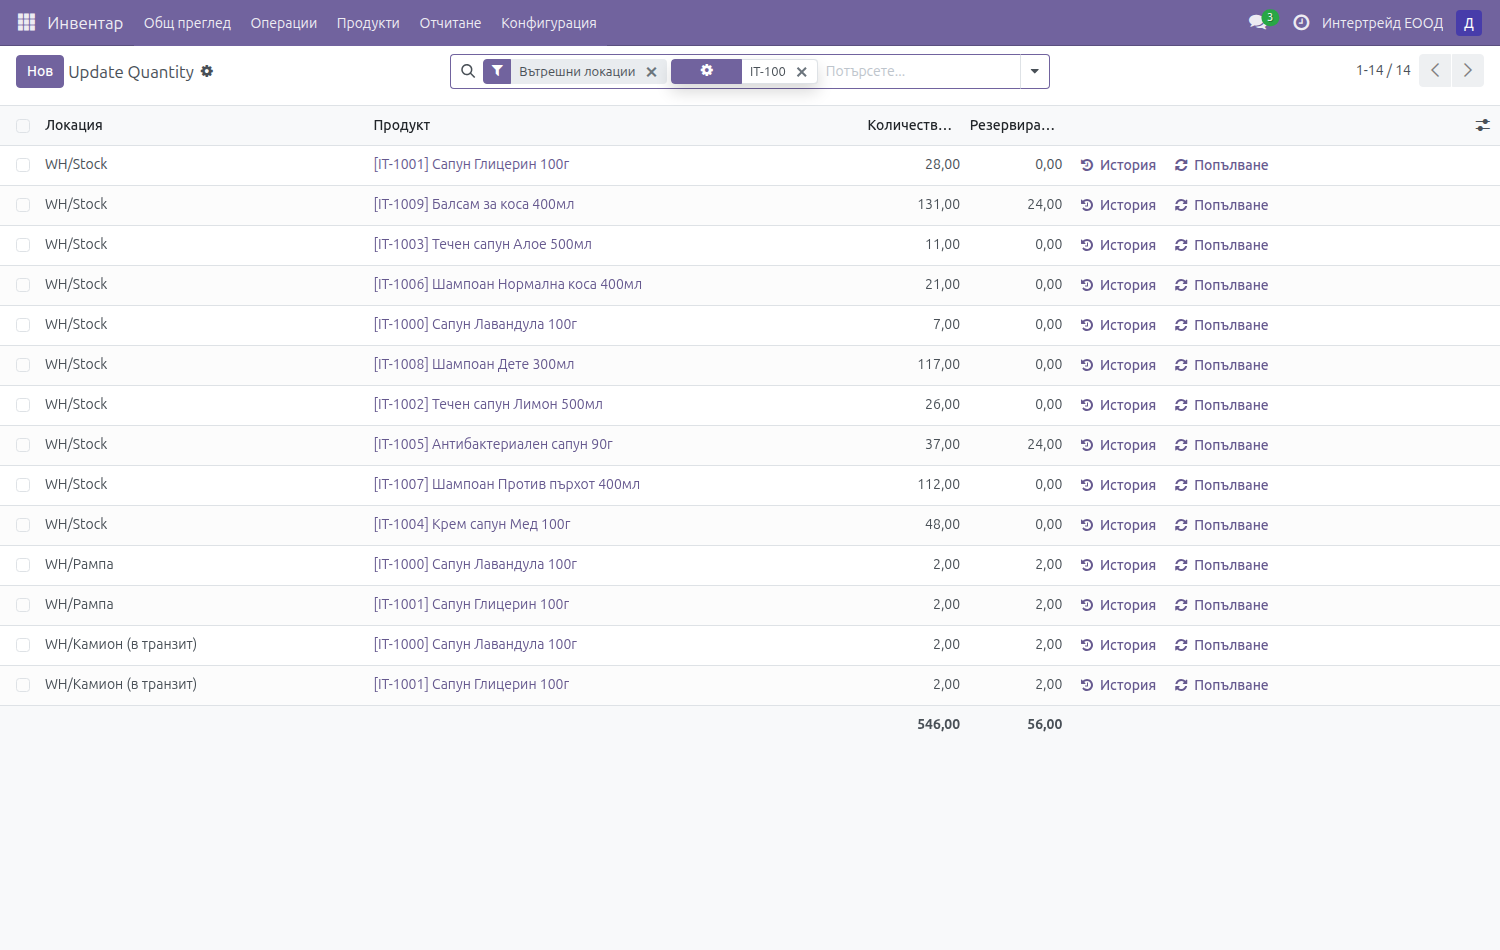
Step 3 — Load: Ramp → Truck (Warehouse worker)
Once Picking is done, the Load (Товарене) operation appears automatically. Here goods go onto the truck.
- Inventory → Operations → Load (Товарене) → open the document (e.g.
WH/PACK/00002). - Scan the products as you load them onto the truck.
- Click Validate.
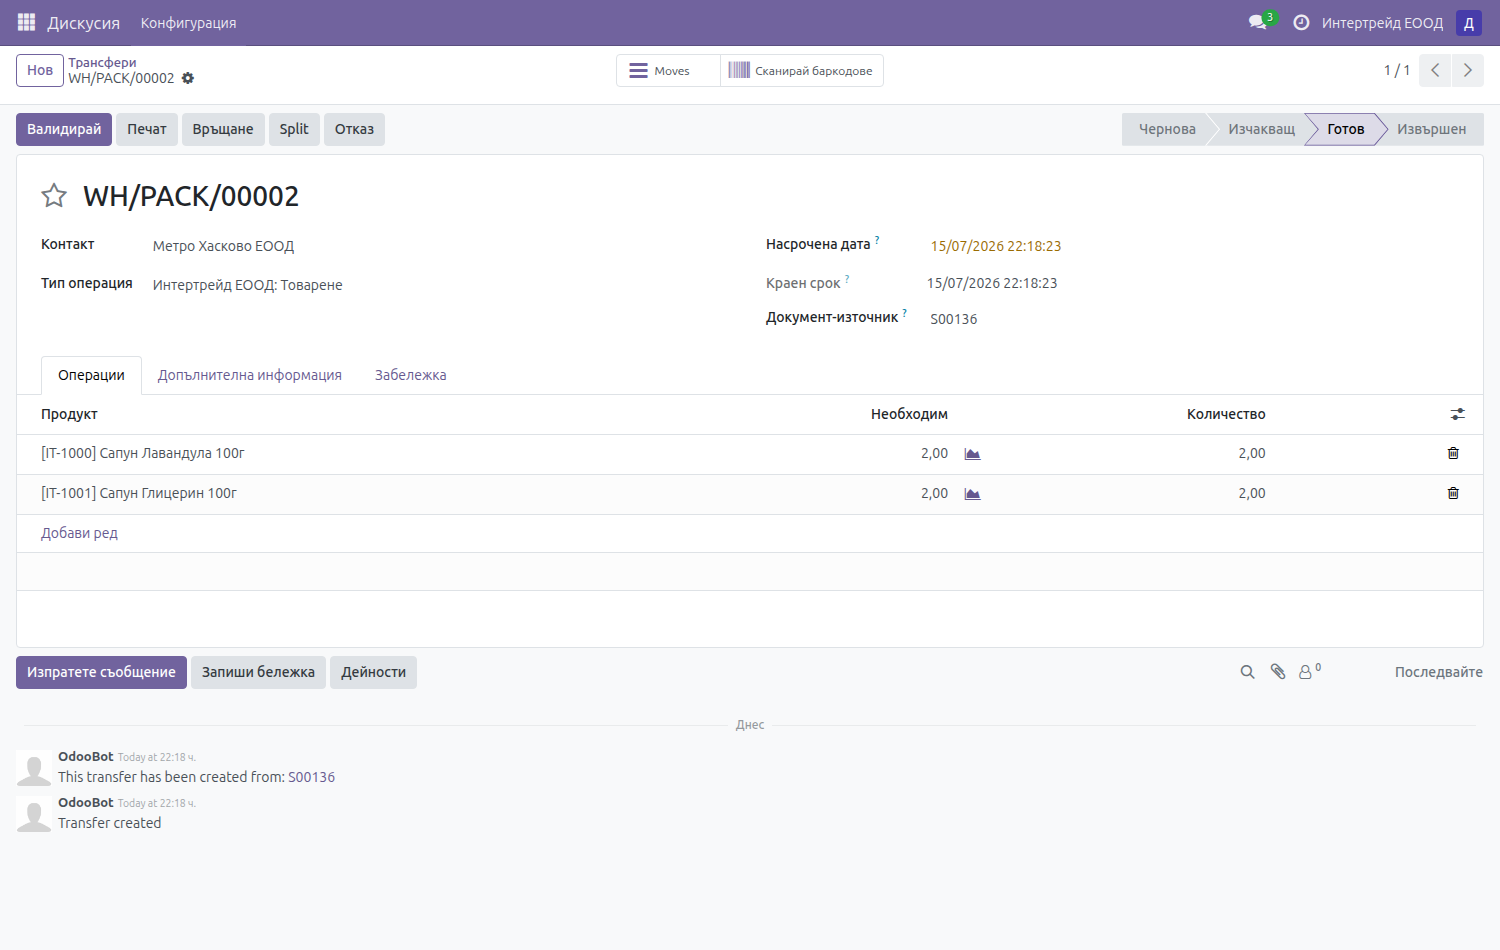
➜ Goods are now in the Truck (in transit).
Step 4 — Route: the driver's run (Office / Dispatcher)
The route is one document grouping a truck's deliveries and carrying which truck and which driver.
- Inventory → Operations → Batch Transfers → New.
- Fill in:
- Responsible — the driver;
- Vehicle — pick the truck from Fleet (e.g. Mercedes-Benz/Actros / СН 4521 АХ);
- Driver — the driver (e.g. Petar Iliev);
- Operation type — Delivery;
- in the Detailed Operations / Transfers tab add the deliveries for the run.
- Save.
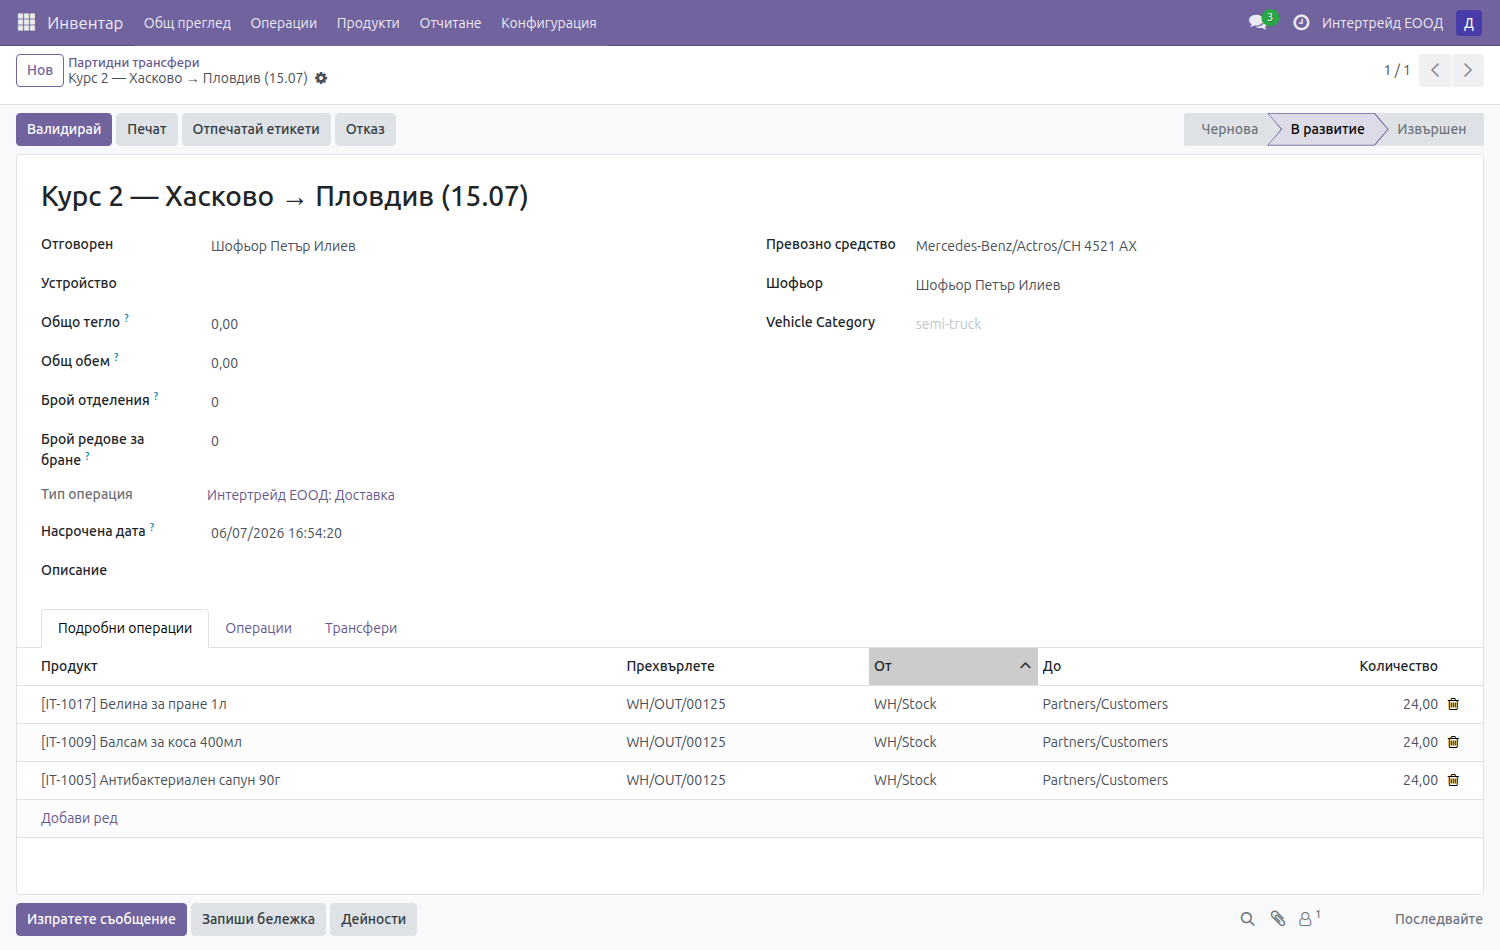
This removes the need for a separate "Shipment Advice". The whole run, the truck and the driver are in one place.
Step 5 — Deliver: Truck → Customer (Driver)
The final stage, appearing once Loading is done.
- Inventory → Operations → Deliveries (Доставки) (or straight from the route) → open the delivery (e.g.
WH/OUT/00137). - On handover the driver scans the items.
- Clicks Validate.
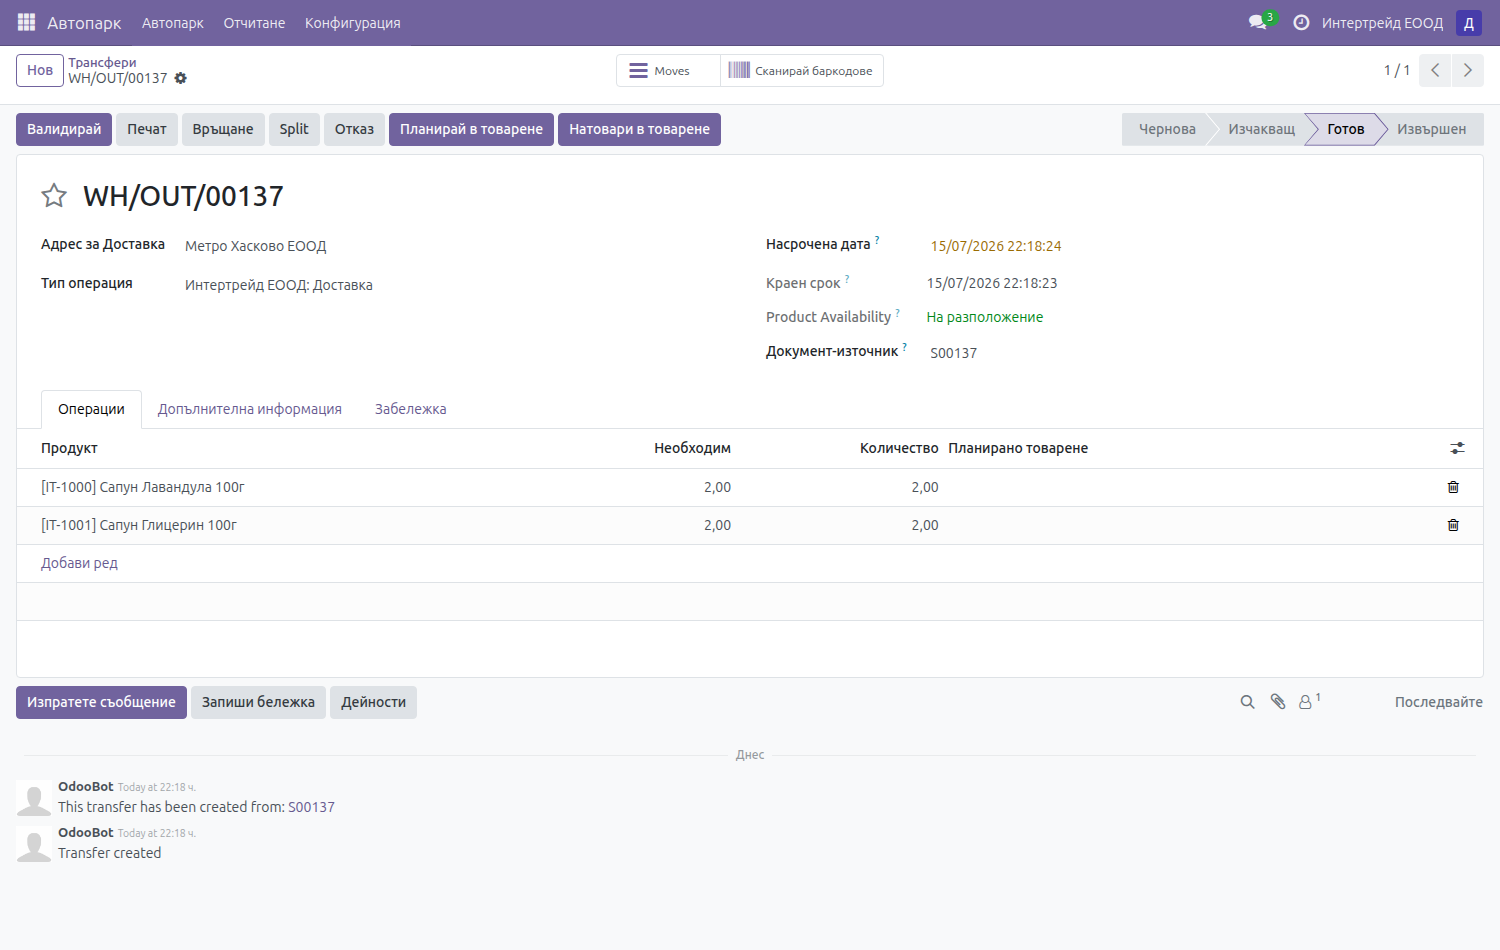
➜ Goods are delivered — they leave the company.
Tracking at any time
That is the whole point: open Inventory → Products → On-Hand Quantities and see exactly how much of each product is in Stock, on the Ramp, in the Truck, or already delivered. The trail is never lost.
Good to know
- Stages appear one at a time. After you confirm the order only Pick is visible; finishing it reveals Load; then Delivery. Not all three at once — this enforces the order.
- Scan at every step via the barcode icon on the document.
- Some buttons render in English (Confirm / Validate / Check Availability / New) — the module ships no Bulgarian translation for them. The menus, operations and locations (Събиране, Товарене, Доставки, Рампа, Камион) are in Bulgarian.
- You don't need a "Shipment Advice". Loading (Ramp → Truck) is the truck loading, and the route carries the truck and driver — one clear flow, no duplicate documents.
Bonus: supplier purchase recommendations
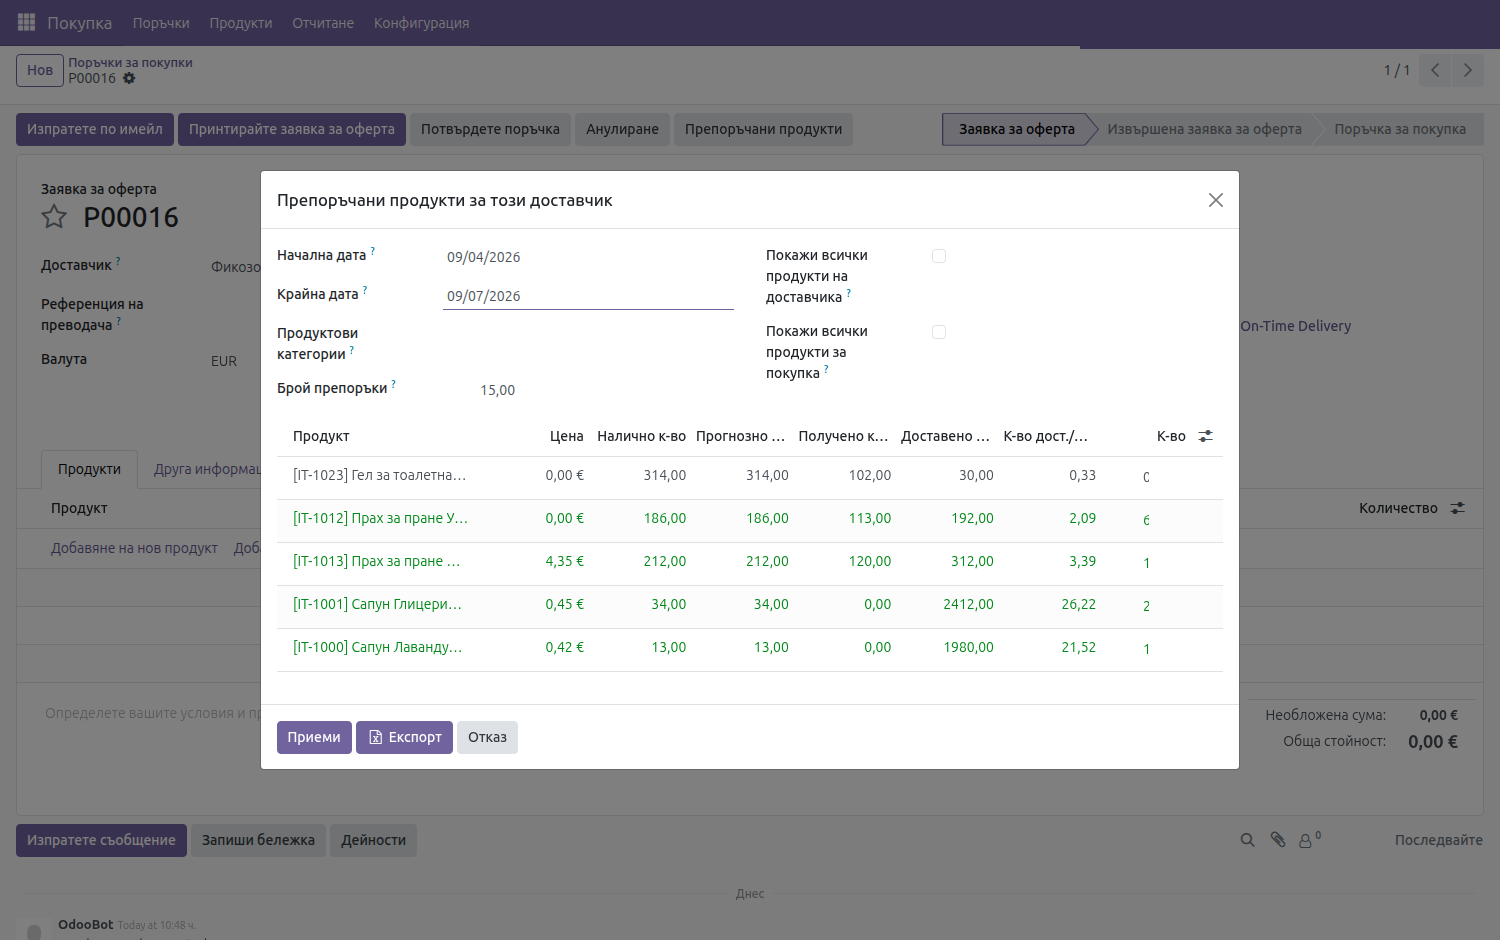
Besides deliveries, PLANA Pulse also helps with buying — a list of what to reorder from a vendor, ranked by what you actually sold.
- Purchase → Purchase Orders → New, pick the vendor.
- In the header click Recommended Products.
- Set a period. The list ranks the vendor's products by units sold — with Qty delivered, Qty/day, On Hand, Forecast and a suggested Qty.
- Adjust and click Accept — the lines enter the order.